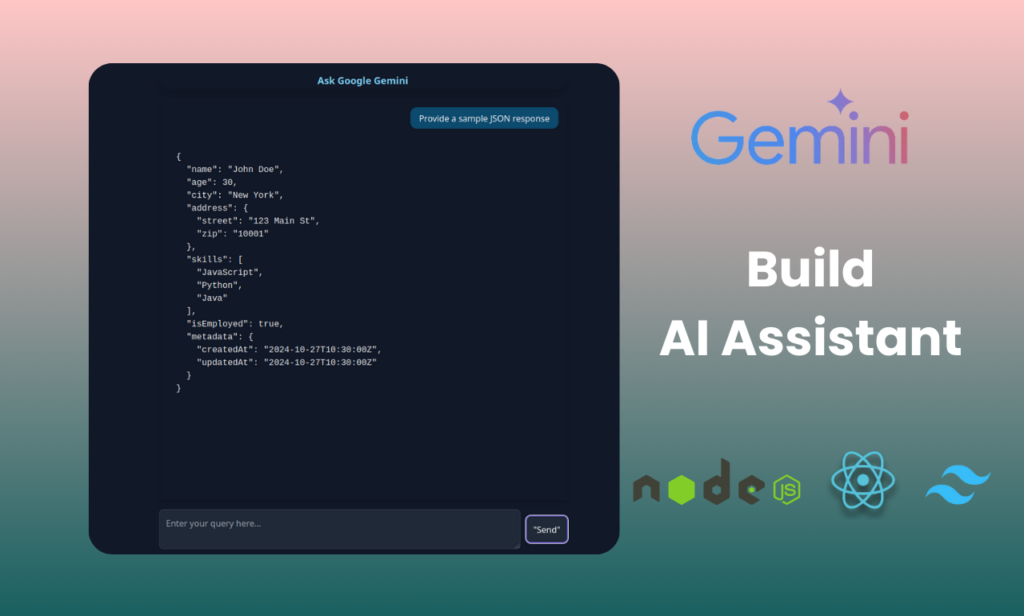
As the world of Artificial Intelligence is evolving, integrating AI capabilities in any web application has become simpler than ever. In this tutorial I will explain you the steps to build an AI assistant using React and Google Gemini. By using flexibility of React and an amazing and free to use Google Gemini LLM, you can create an intelligent AI assistant for variety of use cases. This is a great starter project to learn Next.js and AI integration in web applications. So let’s start setting up the environment for the development.
Setting up your environment
Before diving into the code, you will need to set up the development environment for creating the React project. Make sure you have the below tools and setup ready:
1. Install Node.js
Install the latest version of Node.js.
- Visit the Node.js official website.
- Download the LTS version for your operating system.
- Run the downloaded installer and follow the instructions to complete the installation.
- Verify the installation: Run the below command in terminal to see the installed Node.js and npm versions:
node -v
npm -v
2. Code Editor
- Use a modern code editor like Visual Studio Code to build and mange source code of you Next.js application.
- Install some helpful extensions like Prettier, ESLint, and Tailwind CSS IntelliSense.
3. Creating the project structure
In this project there will be a node js server and a client app using react js.
|- google-gemini-app (node js project)
    |- api    // this will be the server folder containing all the apis
    |- client // this folder will be a ReactJS app for the frontend of the application
The main folder google-gemini-app (you can choose any name you want) will be a NodeJS server. It will have two folders, api and client. The API folder will have the server logic and the client folder will be a React app for the front-end of the app.
Getting the Google Gemini API key
Google Gemini is a powerful AI model developed by Google DeepMind, designed to compete with OpenAI’s GPT-4 and similar models. It integrates advanced natural language processing (NLP) capabilities with multi modal features, enabling it to understand and generate text, process images, and provide insightful solutions for various applications like chat bots, virtual assistants, and data analysis tools. It is free to start with which makes it perfect choice for learning AI integration without spending any cost on subscriptions.
To use Gemini in the application we will require the API KEY. To get the api head over to https://aistudio.google.com/app/apikey and create a new API key.
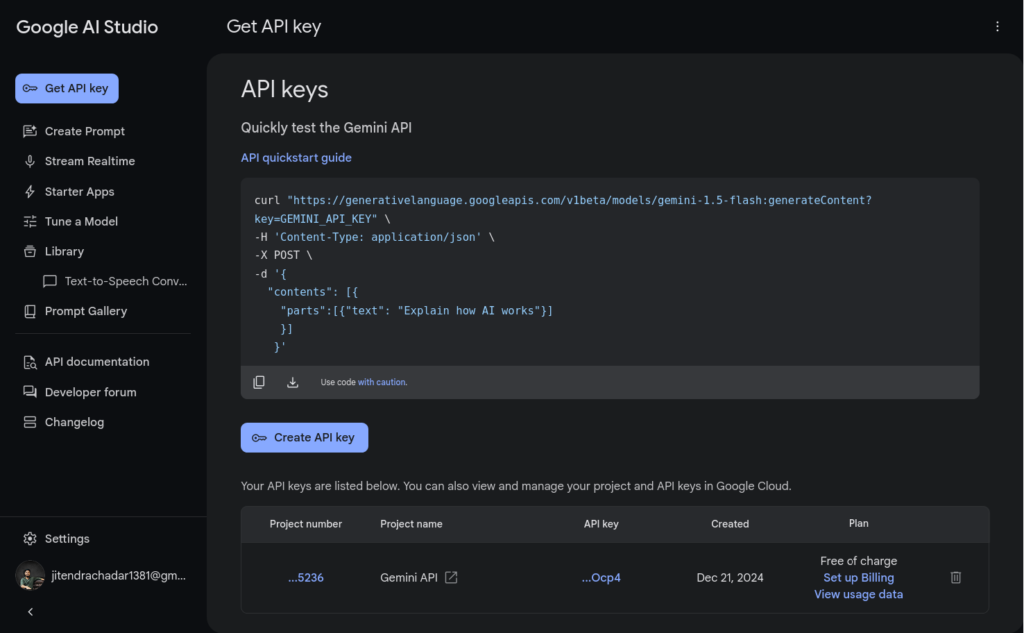
We will use this API key next in the our application server to create an API to fetch response of a prompt from google Gemini.
Creating the server
To create the server navigate to project folder and initialize the project.
cd google-gemini-app
npm init
You will be prompted with below questions to help generate a package.json file:
- Package Name: The name of your project.
- Version: The initial version of your project (default is
1.0.0). - Description: A brief description of the project.
- Entry Point: The main file of your project (default is
index.js). - Test Command: Command to run tests, if applicable.
- Git Repository: URL of the Git repository for the project.
- Keywords: Keywords to help others discover your package (optional).
- Author: The author’s name.
- License: The license for your project (default is
ISC).
This will generate a package.json file with you project information. Next we will install below dependencies which we will be using in our server:
- nodemon: Automatically restarts your Node.js application whenever you make changes to the code, making development more efficient.
- dotenv: Loads environment variables from a
.envfile intoprocess.env, allowing secure and flexible configuration management. - express: A lightweight and flexible web framework for building server-side applications and APIs in Node.js.
- @google/generative-ai: A Node.js client library for accessing Google’s Generative AI models, enabling the integration of advanced AI capabilities like text generation and multimodal functionalities into applications.
// install individually
npm install nodemon
npm install dotenv
npm install express
npm install @google/generative-ai

// or in a single line

npm install nodemon dotenv express @google/generative-ai
Now we need to modify the scripts in package.json to allow nodemon to start the dev server:
"scripts": {
    "dev": "nodemon api/index.js",
    "start": "node api/index.js"
},
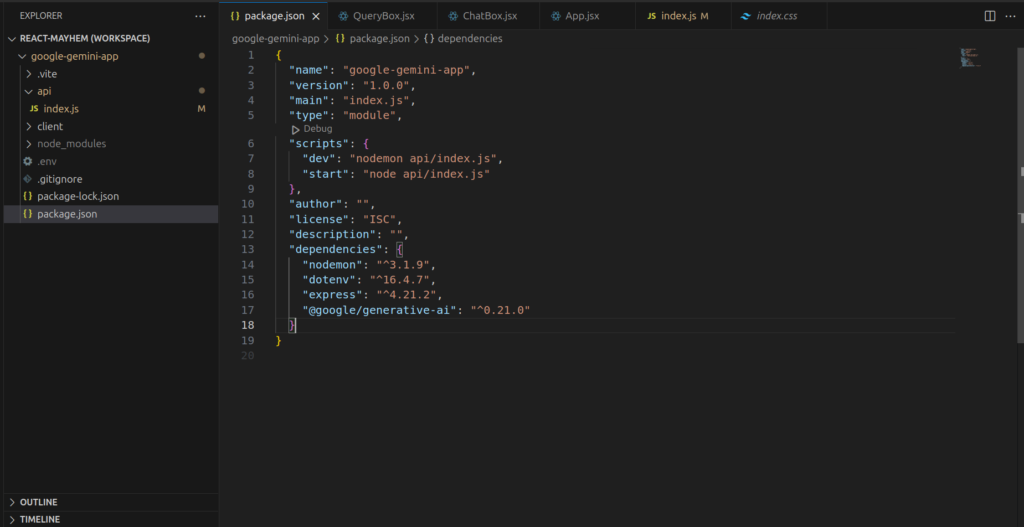
After this your package.json must look like this:
{
  "name": "google-gemini-app",
  "version": "1.0.0",
  "main": "index.js",
  "type": "module",
  "scripts": {
    "dev": "nodemon api/index.js",
    "start": "node api/index.js"
  },
  "author": "",
  "license": "ISC",
  "description": "",
  "dependencies": {
    "nodemon": "^3.1.9",
    "dotenv": "^16.4.7",
    "express": "^4.21.2",
    "@google/generative-ai": "^0.21.0"
  }
}
Creating the API route
Next add the index.js file inside api folder. This file will contain the logic to create and start the server on a specified port. And for the sake of simplicity, we will define the API also in the same file.
Below is the source code of index.js file. This code sets up a simple Node.js server using Express to create an API endpoint (/api/gemini-service) that integrates with Google Gemini (via the @google/generative-ai library) to generate AI-driven content.
import express from "express";
import dotenv from "dotenv";
import { GoogleGenerativeAI } from "@google/generative-ai";

dotenv.config();

const app = express();
app.use(express.json());
app.post("/api/gemini-service", async (req, res) => {
  try {
    const { prompt } = req.body;

    console.log(req.body);

    if (!prompt) {
      return res
        .status(400)
        .json({ error: "Prompt is required in the request body." });
    }

    const genAI = new GoogleGenerativeAI(process.env.GOOGLE_GEMINI_API_KEY);
    const model = genAI.getGenerativeModel({ model: "gemini-1.5-flash" });

    const result = await model.generateContent(prompt);

    console.log("result", result.response.candidates[0].content.parts[0].text);

    res.json({
      success: true,
      message: result.response.candidates[0].content.parts[0].text,
    });
  } catch (error) {
    console.error("Error generating content:", error);
    res
      .status(500)
      .json({ error: "Failed to generate content. Please try again." });
  }
});

const PORT = 3000;
app.listen(PORT, () => {
  console.log(`Server is running on http://localhost:${PORT}`);
});
- Here express is used to create a server and run on PORT 3000
- Next, a POST endpoint is defined
/api/gemini-servicethat accepts apromptin the request body, validates the input, ensuring the prompt is provided; otherwise, returns a400 Bad Requesterror. - A GoogleGenerativeAI client is initialized with the API key and fetches the
gemini-1.5-flashmodel. - At the end the prompt is being sent to the AI model via
generateContentand the generated response is being extracted.
Storing The API Key in .env File
For above code to work, we need to store the api key in .env file. Create a file named .env in the root folder (i.e. the main folder google-gemini-app) and store the API key created in the google AI lab with the key name: GOOGLE_GEMINI_API_KEY.
Testing the API route
With this the server code is completed for this app. Run the server by running below command in the root folder:
// run this command inside the root folder (google-gemini-app)

npm run dev
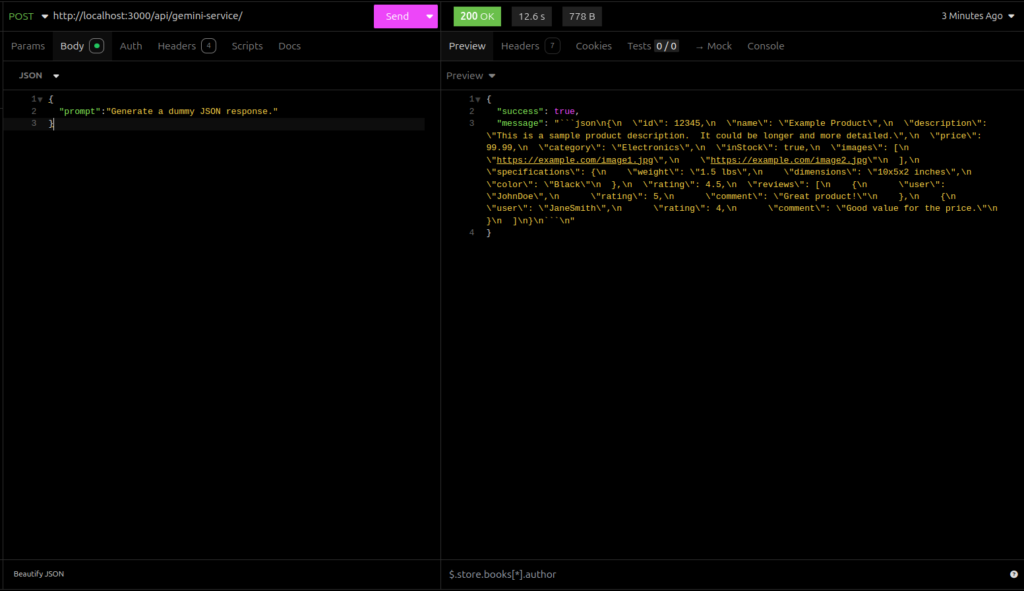
Now you can go ahead and test the API we just created in tools like Postman or Insomnia. Please refer to below screenshot for testing.
Creating the frontend
We will be using Vite for creating the frontend of out app in React.
Vite is a modern front end built tool which make the web development process faster and more efficient. Its features like Instant server Start, Hot Module Replacement (HMR), and many more makes the development of web application smoother. It was created by Evan You, the creator of Vue.js, and is well-suited for modern frameworks like React, Vue, Svelte, and others.
We will be creating the frontend of our app in the client folder. Create a new folder client inside the root folder google-gemini-app.
Then run the following commands in your terminal.
cd client
npm create vite@latest .
When prompted, choose:
- Framework: React
- Variant: JavaScript or TypeScript (based on your preference).
Setup tailwind cSS
We are going to use Tailwind CSS for styling the components in the project. So lets install and setup it up. Follow below steps to complete the tailwind setup in the project.
1. Install Tailwind
Install tailwindcss and its peer dependencies via npm, and create tailwind.config.js file.
npm install -D tailwindcss postcss autoprefixer
npx tailwindcss init
This will install the tailwindcss and its peer dependencies in the project and create a file named tailwind.config.js in client folder.
2. Add Tailwind to your PostCSS configuration
Create a file named postcss.config.js (if not already present) and tailwindcss and autoprefixer to it.
export default {
  plugins: {
    tailwindcss: {},
    autoprefixer: {},
  },
}
3. Update Tailwind Config
Open tailwind.config.js file and replace the existing code with the below code.
export default {
  content: [
    "./index.html",
    "./src/**/*.{js,ts,jsx,tsx}",
  ],
  theme: {
    extend: {
      fontFamily: {
        sans: ['Poppins', 'sans-serif'],
      },
    },
  },
  plugins: [],
}
Here we are adding the paths of our components where tailwind will be used for styling. If you want you add any other fonts as well here in this file.
4. Add the Tailwind directives to your CSS
Open index.css file and replace the existing code with the below code.
@tailwind base;
@tailwind components;
@tailwind utilities;
The tailwind setup is complete now and we are ready to start using it in our project.
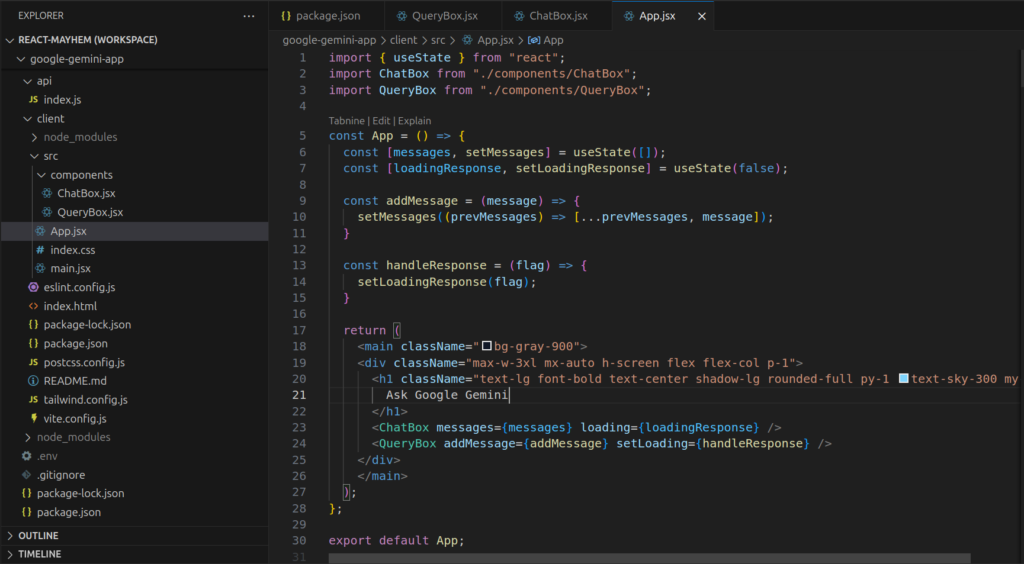
Create App and components
The App.jsx file inside the client folder will contain the main code for the frontend. Remove the existing code in the file and replace it with the below code:
import { useState } from "react";
import ChatBox from "./components/ChatBox";
import QueryBox from "./components/QueryBox";

const App = () => {
  const [messages, setMessages] = useState([]);
  const [loadingResponse, setLoadingResponse] = useState(false);

  const addMessage = (message) => {
    setMessages((prevMessages) => [...prevMessages, message]);
  }

  const handleResponse = (flag) => {
    setLoadingResponse(flag);
  }

  return (
    <main className="bg-gray-900">
    <div className="max-w-3xl mx-auto h-screen flex flex-col p-1">
      <h1 className="text-lg font-bold text-center shadow-lg rounded-full py-1 text-sky-300 my-4">
        Ask Google Gemini
      </h1>
      <ChatBox messages={messages} loading={loadingResponse} />
      <QueryBox addMessage={addMessage} setLoading={handleResponse} />
    </div>
    </main>
  );
};

export default App;
The UI is simple. It has the app heading and then it renders the two components:
- ChatBox: Shows the queries and responses.
- QueryBox: Contain the input for providing the query and a button to send the query.
App.jsx stores messages (queries and responses) and state of response in the state and passes it to ChatBox component as props. It also defines two functions addMessage and handleResponse to update the state variables and passes them as props to the QueryBox component. Next we will see the implementation for the two components.
ChatBox component
This component show the queries from the user and the responses received from the Gemini.
import ReactMarkdown from "react-markdown";

const ChatBox = ({ messages, loading }) => {
  return (
    <div className="flex-1 overflow-y-auto space-y-8 px-4 py-4  rounded-t-lg shadow-md">
      {messages.map((message, index) => (
        <div
          key={index}
          className={`flex ${
            message.type === "user" ? "justify-end" : "justify-start"
          }`}
        >
          <div
            className={`py-2 px-4 text-gray-100 ${
              message.type === "user"
                ? "  max-w-[75%] bg-sky-900 rounded-xl"
                : ""
            }`}
          >
            {message.type === "user" ? (
              `${message.text}`
            ) : (
              <ReactMarkdown
                className="prose"
                components={{
                  strong: ({ node, ...props }) => (
                    <strong className="text-gray-200 font-bolder" {...props} />
                  ),
                  p: ({ node, ...props }) => (
                    <p className="text-gray-300" {...props} />
                  ),
                  li: ({ node, ...props }) => (
                    <li className="text-gray-300" {...props} />
                  ),
                  code: ({ node, ...props }) => (
                    <code className="text-gray-500" {...props} />
                  ),
                }}
              >
                {message.text}
              </ReactMarkdown>
            )}
          </div>
        </div>
      ))}
      {loading && (
        <div className="flex justify-start">
          <p className="text-orange-200">Loading...</p>
        </div>
      )}
    </div>
  );
};

export default ChatBox;
If you notice we have used ReactMarkdown from “react-markdown”. We could have just used a paragraph and it would work just fine. But there is a reason to use ReactMarkdown here. If you notice the response from the API when we tested the API.
{
	"success": true,
	"message": "```json\n{\n  \"id\": 12345,\n  \"name\": \"Example Product\",\n  \"description\": \"This is a sample product description.  It could be longer and more detailed.\",\n  \"price\": 99.99,\n  \"category\": \"Electronics\",\n  \"inStock\": true,\n  \"images\": [\n    \"https://example.com/image1.jpg\",\n    \"https://example.com/image2.jpg\"\n  ],\n  \"specifications\": {\n    \"weight\": \"1.5 lbs\",\n    \"dimensions\": \"10x5x2 inches\",\n    \"color\": \"Black\"\n  },\n  \"rating\": 4.5,\n  \"reviews\": [\n    {\n      \"user\": \"JohnDoe\",\n      \"rating\": 5,\n      \"comment\": \"Great product!\"\n    },\n    {\n      \"user\": \"JaneSmith\",\n      \"rating\": 4,\n      \"comment\": \"Good value for the price.\"\n    }\n  ]\n}\n```\n"
}
Here the message contain the response from the Gemini. And the responsse is not exactly JSON. It is actually a markdown. The first few characters specify that this response is a JSON response. Similarly for other queries the response markup can have different format like for specifying list annd other such items.
The ReactMarkdown formats this reponse and renders it in proper format. So to make this code word we need to install the react-markdown dependency. Run below command to install it in client:
npm install react-markdown
QueryBox Component
This component contains the a textbox for query input and a button to send the query. This component also shows error if the API request fails for some reason.
import { useState } from "react";

const QueryBox = ({ addMessage, setLoading }) => {
  const [query, setQuery] = useState("");
  const [error, setError] = useState("");

  const handleSend = async () => {
    if (!query) return;
    setLoading(true);
    setError("");

    // Add the user's query to the chat history
    addMessage({ type: "user", text: query });
    try {
      const result = await fetch("/api/gemini-service", {
        method: "POST",
        headers: { "Content-Type": "application/json" },
        body: JSON.stringify({
          prompt: query,
        }),
      });
      const data = await result.json();

      if (data.success === false) {
        setError("Failed to fetch response. Please try again.");
        return;
      }

      // Add AI's response to the chat history
      addMessage({ type: "ai", text: data.message });
      setQuery("");
    } catch (err) {
      setError("Failed to fetch response. Please try again.");
    } finally {
      setLoading(false);
    }
  };

  return (
    <>
      {error && <p className="text-red-500 my-2 text-center">{error}</p>}

      <div className="sticky bottom-0  py-4 ">
        <div className="flex items-center space-x-3">
          <textarea
            value={query}
            onChange={(e) => setQuery(e.target.value)}
            className="w-full text-white p-3 border border-gray-700 bg-gray-800 rounded-lg focus:outline-none"
            rows="2"
            placeholder="Enter your query here..."
          />
          <button
            onClick={handleSend}
            className="bg-gray-800 text-white p-3 rounded-lg hover:bg-gray-600"
          >
            "Send"
          </button>
        </div>
      </div>
    </>
  );
};

export default QueryBox;
The handleSend function takes care of call the /api/gemini-service service.
If you notice, the server is running on port 3000. In dev the URL will be http://localhost:3000/api. Similarly the client is running on the port 5173 with URL http://localhost:5173/. So the current api URL in fetch will fail as there is no protocol and the hostman in the URL. We will solve this in the next section.
Setting up proxy for the server
To solve the problem that we had in previous section, we will setup a proxy for the server. Open the vite.config.js in client folder and replace the exsiting code with below code:
import { defineConfig } from 'vite'
import react from '@vitejs/plugin-react-swc'

export default defineConfig({
  server: {
    proxy: {
      '/api': {
        target: 'http://localhost:3000',
        secure: false
      }
    }
  },
  plugins: [react()],
})
Here we are specifying that whereever we use /api in the URL in client the target will the http://localhost:3000 which the URL for out server.
With this the code is complete for the frontend. You can make the UI as per your linking. Once done you can run the client by running below command in client folder:
// run this command inside client folder

npm run dev
Source Code
In case you missed or got stuck in any of the steps, you can find source code of this app in this GitHub Repository. If you liked this tutorial and learned something new from it, consider giving a star to the repository.
Conclusion
In this tutorial we learned how to build an AI assistant using React and Google Gemini. We created a server using express in node js and exposed a POST endpoint for fetching response from Google Gemini using @google/generative-ai dependency. We learned how we can create an API key for Google Gemini. We then created the frontend and learned to setup tailwind css, use of ReactMarkdown and how to setup a proxy for the server.
This was a very basic app but a good start point to learn the AI integration in web application. Feel free to enhance it and customize it for your personal idea.
Happy Coding!


